Simulate Illumina Reads
InSilicoSeq is software that simulates Illumina reads from genomes, and was especially built to simulate reads from metagenomes. InSilicoSeq is written in Python, is fairly well-documented, and easily installed via Python’s package manager pip(3).
Why use simulated data?
With so many bioinformatics tools currently available to users, simulated datasets are ideal for quickly generating toy datasets based on real data to test new tools for general usability and user task suitability. For example, a researcher could test a variant calling pipeline on data simulated from the human genome. If the data simulation did not introduce new mutations relative to the original human genome used for simulation, variants should not be detected. Simulated datasets are also useful for teaching, since they can be readily shared unlike protected (human) data.
Learning Objectives
-
Simulate fastq files
-
Check the quality of simulated files
~ 60 min to run entire tutorial
< $1.00
-
AWS account
-
Basic command line
Selecting the right AWS instance to run InSilicoSeq
Warning
-
To avoid unnecessary charges, remember to terminate your AWS instance once you are done using it.
-
Before terminating your instance, make sure to transfer all the files you need to your local computer or storage volume.
In this tutorial you will run InSilicoSeq on a 64 bit Ubuntu Server 20.04 LTS (HVM), SSD Volume Type instance. Instructions on how to launch an AWS instance and access it are described in our AWS tutorial. Please follow those instructions with a few modifications:
Step 1: Select Instance
You must select the the t2.xlarge instance (instead of the default t2.micro instance selection described in the tutorial):

Warning
t2.xlarge machine is not part of AWS's free tier. Running this instance costs money to all users, including those who have free tier access. Check the estimated cost section at the top of this page.
Step 2: Add Storage
After choosing t2.xlarge, click on the "4. Add Storage" tab on the instance launch page and then change the "Size (GB)" tab to read "16", as shown in the image below:

You need to add more storage because, while the output fastq files themselves are small (<20MB), temporary files generated during the simulation take up a lot of space.
Step 3: Review and Launch
Click "Review and launch".
Step 4: Access the Instance
Then go back to the AWS tutorial and follow instructions on how to access the instance via the MacOS terminal window.
Installing InSilicoSeq
Important
You must run all these commands and installations on your AWS Ubuntu instance and not your local terminal
InSilicoSeq can be installed using Python's package manager pip3. However, AWS's Ubuntu 20.04 instance does not come pre-installed with pip3. Let's begin by updating the instance and installing pip3.
sudo apt update
sudo apt install python3-pip
1 upgraded, 50 newly installed, 0 to remove and 32 not upgraded.
Need to get 46.8 MB of archives.
After this operation, 200 MB of additional disk space will be used.
Do you want to continue? [Y/n]
Type Y and hit ENTER
Now you can install InSilicoSeq:
pip3 install InSilicoSeq
ubuntu@ip-172-31-20-244:~$ pip3 install InSilicoSeq
Collecting InSilicoSeq
  Downloading InSilicoSeq-1.5.1-py3-none-any.whl (1.5 MB)
     |████████████████████████████████| 1.5 MB 4.5 MB/s
Collecting future
  Downloading future-0.18.2.tar.gz (829 kB)
     |████████████████████████████████| 829 kB 19.7 MB/s
Collecting numpy
  Downloading numpy-1.19.4-cp38-cp38-manylinux2010_x86_64.whl (14.5 MB)
     |████████████████████████████████| 14.5 MB 29.3 MB/s
Collecting joblib
  Downloading joblib-0.17.0-py3-none-any.whl (301 kB)
     |████████████████████████████████| 301 kB 64.3 MB/s
Collecting biopython
  Downloading biopython-1.78-cp38-cp38-manylinux1_x86_64.whl (2.3 MB)
     |████████████████████████████████| 2.3 MB 65.1 MB/s
Requirement already satisfied: requests in /usr/lib/python3/dist-packages (from InSilicoSeq) (2.22.0)
Collecting scipy
  Downloading scipy-1.5.4-cp38-cp38-manylinux1_x86_64.whl (25.8 MB)
     |████████████████████████████████| 25.8 MB 65.7 MB/s
Collecting pysam>=0.15.1
  Downloading pysam-0.16.0.1-cp38-cp38-manylinux1_x86_64.whl (10.2 MB)
     |████████████████████████████████| 10.2 MB 66.2 MB/s
Building wheels for collected packages: future
  Building wheel for future (setup.py) ... done
  Created wheel for future: filename=future-0.18.2-py3-none-any.whl size=491058 sha256=1312269d5247af1a692f235f4f4c9b420664bcdaea4a96816d2d37995e0d8872
  Stored in directory: /home/ubuntu/.cache/pip/wheels/8e/70/28/3d6ccd6e315f65f245da085482a2e1c7d14b90b30f239e2cf4
Successfully built future
Installing collected packages: future, numpy, joblib, biopython, scipy, pysam, InSilicoSeq
  WARNING: The scripts futurize and pasteurize are installed in '/home/ubuntu/.local/bin' which is not on PATH.
  Consider adding this directory to PATH or, if you prefer to suppress this warning, use --no-warn-script-location.
  WARNING: The scripts f2py, f2py3 and f2py3.8 are installed in '/home/ubuntu/.local/bin' which is not on PATH.
  Consider adding this directory to PATH or, if you prefer to suppress this warning, use --no-warn-script-location.
  WARNING: The script iss is installed in '/home/ubuntu/.local/bin' which is not on PATH.
  Consider adding this directory to PATH or, if you prefer to suppress this warning, use --no-warn-script-location.
Successfully installed InSilicoSeq-1.5.1 biopython-1.78 future-0.18.2 joblib-0.17.0 numpy-1.19.4 pysam-0.16.0.1 scipy-1.5.4
Set the path variable
For the Ubuntu machine to recognize the InSilicoSeq executable, we need to add the bin (where InSilicoSeq was downloaded) to Ubuntu's search path.
export PATH=$PATH:~/.local/bin
Now your Ubuntu machine should be able to find InSilicoSeq. You can check to see if it was properly installed like this:
iss --version
iss version 1.5.1
If you see the version number printed on the screen, you are good to go!
Download the human reference genome
InSilicoSeq simulates reads based on one or more input reference genomes. We will use the human reference genome GRCh38.
First, make a directory called "reference_genome" using the command mkdir. Then download the compressed (".gz" extension) human reference genome inside the new folder and unzip the ".fna" file.
mkdir reference_genome
cd reference_genome
curl -LO ftp://ftp.ncbi.nlm.nih.gov/refseq/H_sapiens/annotation/GRCh38_latest/refseq_identifiers/GRCh38_latest_genomic.fna.gz
gunzip GRCh38_latest_genomic.fna.gz
The human genome should be 3.1 Gb when uncompressed. You can check its size using the ls -th command.
Running InSilicoSeq
Make a directory called "fastq" in which the simulated fastq files can be saved.
mkdir fastq
cd fastq
Finally, run the code to make your simulated fastq file.
iss generate --genomes ../reference_genome/GRCh38_latest_genomic.fna --model hiseq --n_reads 5M --cpus 4 --output my_sim
ubuntu@ip-172-31-26-57:~/fastq$ iss generate --genomes ../reference_genome/GRCh38_latest_genomic.fna --model hiseq --n_reads 5M --output 1_sample
INFO:iss.app:Starting iss generate
INFO:iss.app:Using kde ErrorModel
INFO:iss.util:Stitching input files together
INFO:iss.app:Using lognormal abundance distribution
INFO:iss.app:Using 2 cpus for read generation
INFO:iss.app:Generating 5000000 reads
INFO:iss.app:Generating reads for record: NC_000001.11
INFO:iss.app:Generating reads for record: NT_187361.1
INFO:iss.app:Generating reads for record: NT_187362.1
INFO:iss.app:Generating reads for record: NT_187363.1
INFO:iss.app:Generating reads for record: NT_187364.1
INFO:iss.app:Generating reads for record: NT_187365.1
....
What are all these flags?
--model lets you input an error model file. The default is None. You're using hiseq for a pre-computed error model suitable for simulating data generated from a HiSeq sequencing run. Other available options are NovaSeq and MiSeq. If you do not wish to use a model, use –mode basic. The names of the built-in models are case insensitive.
--n_reads specifies the number of reads to be simulated. The default is 1 million (1M).
--cpus specifies the number of CPUs that should be used. Default is 2.
--output specifies the name of the output files. You're calling it my_sim, but you can change it to whatever suits your needs.
Important
The simulation step takes ~30 minutes to complete. Please do not close the terminal window until the simulation run is complete. Closing the terminal before the simulation is complete will interrupt the run and you will have to start over.
If your run is successful, you will see two ".fastq" files: "my_sim_R1.fastq" and "my_sim_R2.fastq", and an abundance file called "my_sim_abundance.txt". The abundance file is more meaningful in the context of simulating metagenomic data. It is a tab-delimited file containing the abundance of each genome supplied to the command. The 5 M reads generated per simulation are split between the R1 and R2 files.
Looping InSilicoSeq
If you want to repeat the simulation multiple times, modify the following code block by changing the n to an integer corresponding to the number of times you wish to run the simulation. Your output files will be named
- 1_my_sim_R1 and 1_my_sim_R2
- 2_my_sim_R1 and 2_my_sim_R2
- ...
- n_my_sim_R1 and n_my_sim_R2.
for i in {1..n};
do iss generate --genomes ../reference_genome/GRCh38_latest_genomic.fna --model hiseq --n_reads 5M --cpus 4 --output ${i}_my_sim;
done
Warning
Depending on how many times you run the simulation and/or how many reads you simulate, the code may take a really long time to complete! You can start out by running a small set of reads (--n_reads 1M) to test the code before scaling up.
Quality control
With real data, one must always perform quality control to ensure that the raw data looks good. With simulated data, you can do some simple quality control to make sure nothing went terribly wrong with the simulation itself and that you have the desired read length.
Let's use FastQC to generate a quality control report.
Install FastQC
To install FastQC run this code:
sudo apt install fastqc
Run FastQC
Now run FastQC on your fastq files:
fastqc *.fastq
You are using the * wildcard to help specify all of the .fastq files here.
Transfer to Local Computer
The easiest way to visualize the output is to transfer it to your local computer. First, let's list all the files and pull out the report summaries (.html) using ls:
ls *fastqc.zip
ls *.html
Now you can move the ".html" files to your local computer to visualize:
scp -i ~/Desktop/amazon.pem ubuntu@ec2-??-???-???-??.us-east-2.compute.amazonaws.com:/home/ubuntu/fastq/\*.html ~/Desktop/fastqc/.
You might need to confirm the download by typing "yes" if prompted:
Are you sure you want to continue connecting (yes/no/[fingerprint])? yes"
Important
This code block must be run on your local terminal window and not on the AWS terminal. You can start a new terminal by typing cmd+N
Remember to replace:
-
~/Desktop/amazon.pemwith the path to your amazon.pem -
??-???-???-??.us-east-2.compute.amazonaws.comwith your specific instance. For more details on how to connect to an instance, visit the AWS set up page of the "GWAS in the Cloud" tutorial.
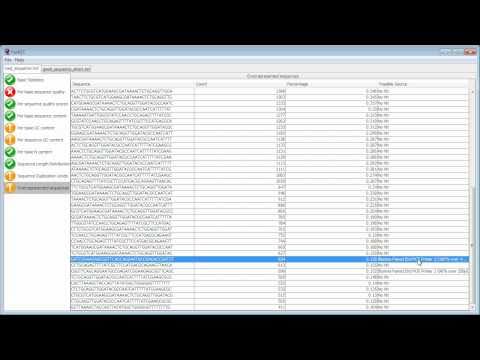
Here is an image of the top of an example FastQC report.

Interpretation
This YouTube video made by the Babraham Bioinformatics Institute (the developers of FastQC) on how to interpret FastQC results has more information on interpreting FastQC results:
From the FastQC report, we see that the overall read quality scores are good and read length is 126bp. These simulated reads are now ready to be used for analysis!
AWS Instance Termination
-
To avoid unnecessary charges, remember to terminate your AWS instance once you are done using it.
-
It is important to remember that terminating the instance causes all the data in that instance to be lost forever. If you wish to keep the fastq files, please remember to transfer them to your local machine or analysis platform. To transfer simulated fastq files from AWS to your local machine, paste the following code in your local terminal (not AWS instance terminal).
scp -i ~/Desktop/amazon.pem ubuntu@ec2-??-???-???-??.us-east-2.compute.amazonaws.com:/home/ubuntu/fastq/\*.zip ~/Desktop/fastqc/.
You can also check out our tutorial on transferring files from AWS to Cavatica.