Connecting to your Instance
This is an OS-agnostic way of connecting to your AWS instance. The advantage of using this method is that Windows users do not need to worry about downloading an SSH client such as MobaXterm. The main disadvantage is that you cannot download files from the instance to your local machine via this web terminal interface.
Step 1: Find your launched instance
- Go to the page that lists all your instances: https://us-west-1.console.aws.amazon.com/ec2/v2/home?region=us-west-1#Instances
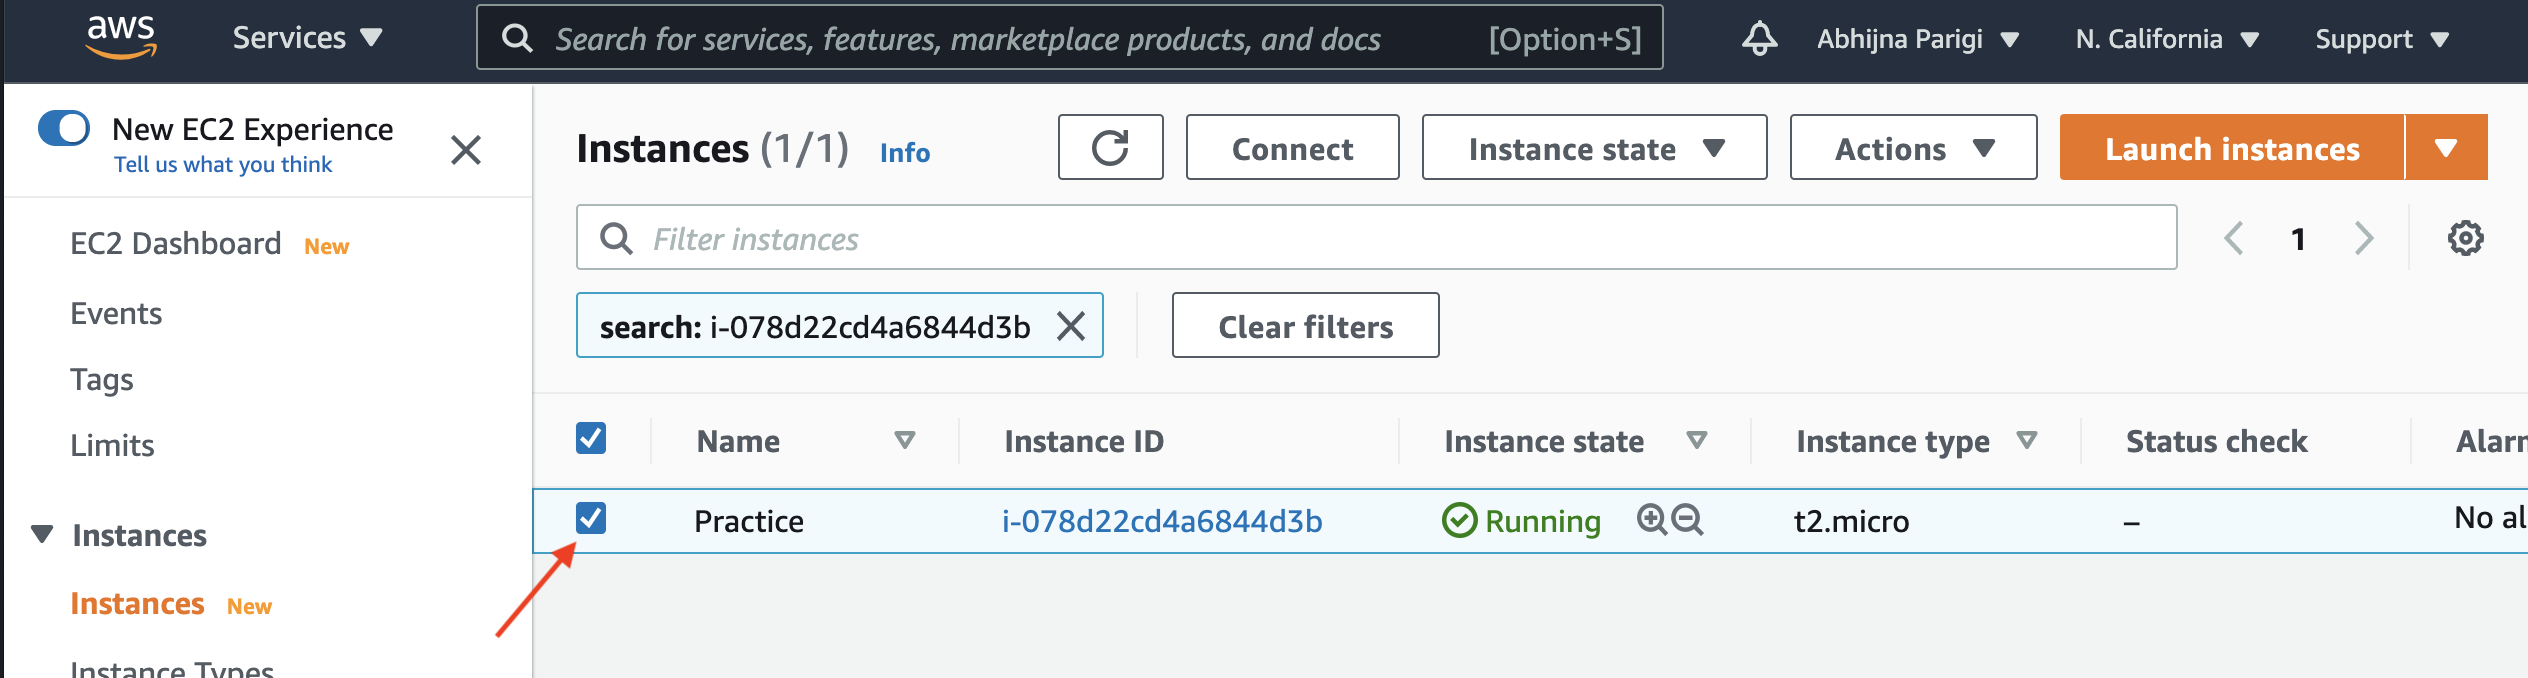
Step 2: Select the instance
- Check the box next to your running instance.
Step 3: Connect
- Click on the Connect button on the top of the screen.

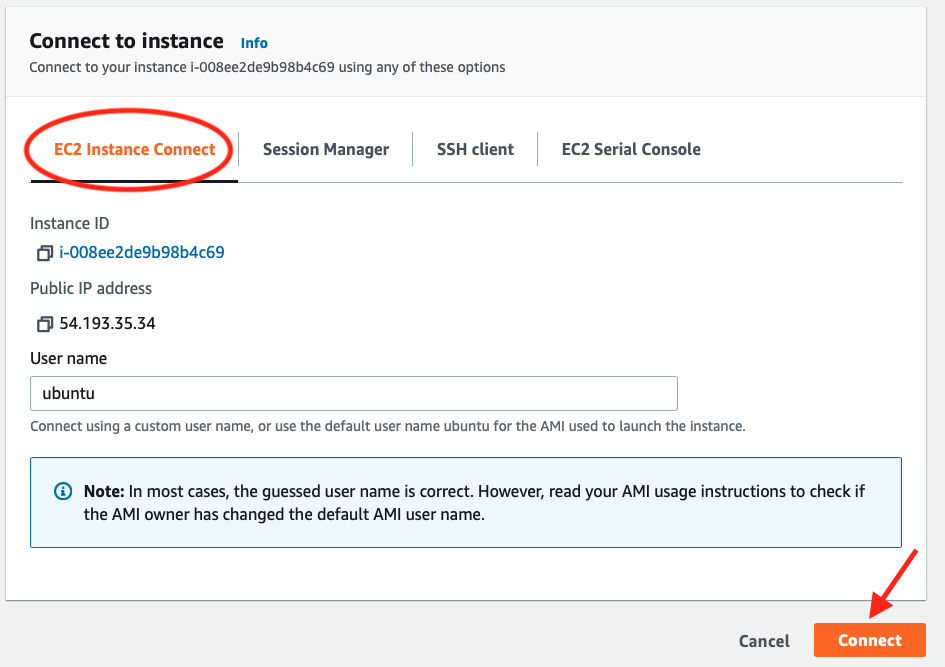
Step 4: EC2 instance connect tab
- On this page, make sure the EC2 Instance Connect tab is selected (orange highlight).
- Click theConnect button located at the bottom of the page.
- Do not change the default username. It should read ubuntu.
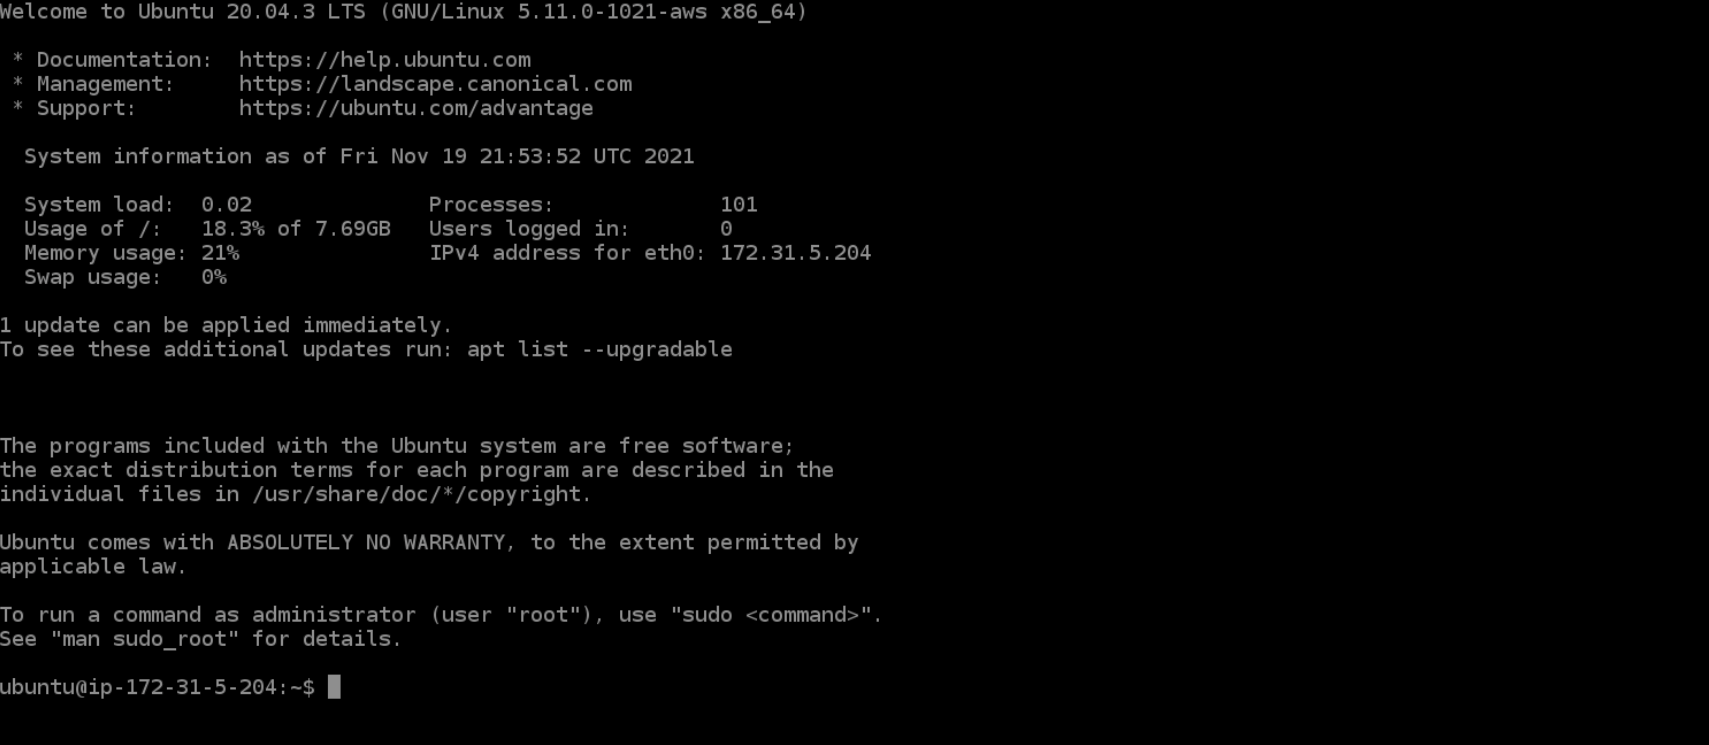
Step 5: Web browser terminal tab
- A terminal window will open up in a new tab.
Timeout
The web browser terminal will become unresponsive after some inactivity. If that happens, make sure to close the terminal window and reconnect by following Steps 3 & 4.
Congratulations! You have successfully connected to your remote computer. You can download files onto your instance and install software programs via this web browser terminal.
Ok, so you've created a running computer. How do you get to it?
The main thing you'll need is the network name of your new computer. To retrieve this, go to the AWS instance view, click on the instance, and find the "Public DNS". This is the public name of your computer on the internet.
Step 1: Open MobaXTerm
MobaXTerm is a terminal for Windows with an X11 server, a tabbed SSH client and several other network tools for remote computing (VNC, RDP, telnet,rlogin).
MobaXterm brings all the essential Unix commands to Windows desktop, in a single portable exe file which works out of the box. You can download the Home Edition for free.
Step 2: Start a new session
- Click on Session located in top left hand corner
- Choose SSH
- Click OK.


Step 3: Set up ssh settings
- Enter the public DNS address from the AWS instance page in the Remote host box. It will look something like this:
ec2-XXX-YYY-AAA.compute-1.amazon.aws.com. - Enter ubuntu for Specify username.

- Under Advanced SSH settings, check the box by Use private key and search for the path to your amazon.pem key pair file.

- Click OK to complete session set up.
If you see this screen and ubuntu@ip-###-##-#-##:~$ as the command prompt, your AWS instance computer is ready for use!

Step 4: Transferring files
With MobaXterm, you can transfer files between your local computer and the remote instance by dragging and dropping files between MobaXterm's SCP tab (located on the left-hand side of the MobaXterm window) and your local computer's file explorer.


Ok, so you've created a running computer. How do you get to it?
The main thing you'll need is the network name of your new computer. To retrieve this, go to the AWS instance view, click on the instance, and find the Public DNS under the Details tab. This is the public name of your computer on the internet.
Step 1: Locate private key
Find the private key file; it is the .pem file you downloaded when starting up the EC2 instance. We called it amazon.pem. It should be in your Downloads folder. In this lesson, we move it to the desktop for ease of access and compatibility with our lesson commands.
Step 2: Login to remote instance
- Start Terminal and change the permissions on the
.pemfile for security purposes. Your private key must not be publicly visible. - Run the following command so that only the owner i.e. you can read the file.
chmod 400 ~/Desktop/amazon.pem
- Connect to remote instance:
ssh -i ~/Desktop/amazon.pem ubuntu@ ec2-???-???-???-???.compute-1.amazonaws.com
where ec2-???-???-???-???.compute-1.amazonaws.com is the Public DNS we copied earlier.
Step 3: Transferring Files
Copying files from remote instance to local computer
- To use
scp(secure copy) with a key pair use the following command:
scp -i ~/Desktop/amazon.pem [email protected]:path/to/file /your/local/directory/files/to/download
- You may also download a file from the remote instance download folder by archiving it:
zip -r squash.zip /your/ec2/directory/
- You can download all archived files from the remote instance by entering:
scp -i ~/Desktop/amazon.pem [email protected]:~/* /your/local/directory/files/to/download
Copying files from local computer to remote instance
- To use
scpwith a key pair use the following command:
scp -i ~/Desktop/amazon.pem /your/local/file/to/copy [email protected]:path/to/file
Note
You need to make sure that the user "user" has the permission to write in the target directory. In this example, if ~/path/to/file was created by you, it should be fine.